
Fujiiryoki Quy trình sử dụng ghế mát-xa: Bản trình bày từng bước ánh xạ tiếng Thụy Điển, Shiatsu, mô sâu & bấm huyệt đến các bộ phận cơ thể được nhắm mục tiêu và lợi ích trị liệu
Giới thiệu
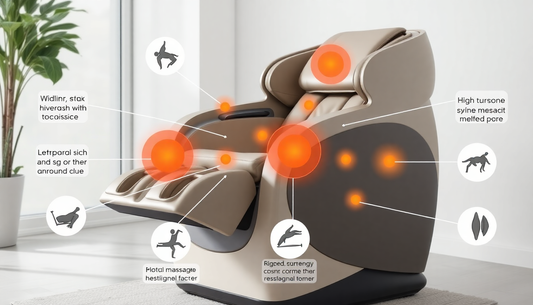
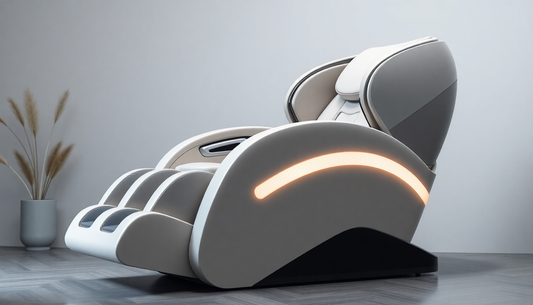
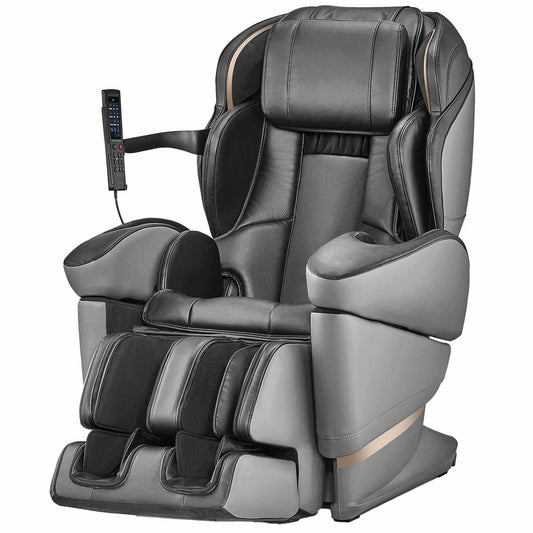
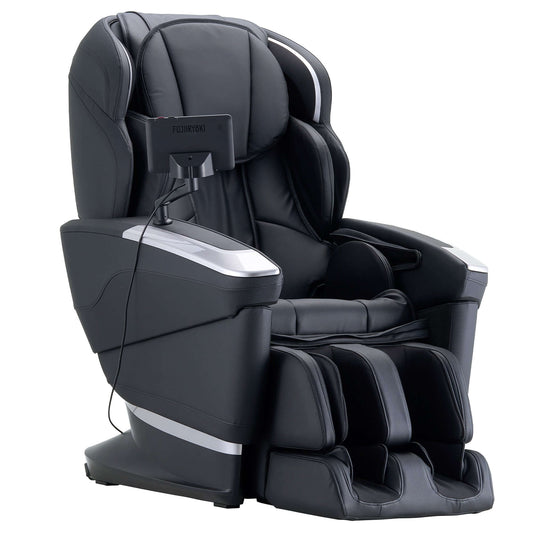
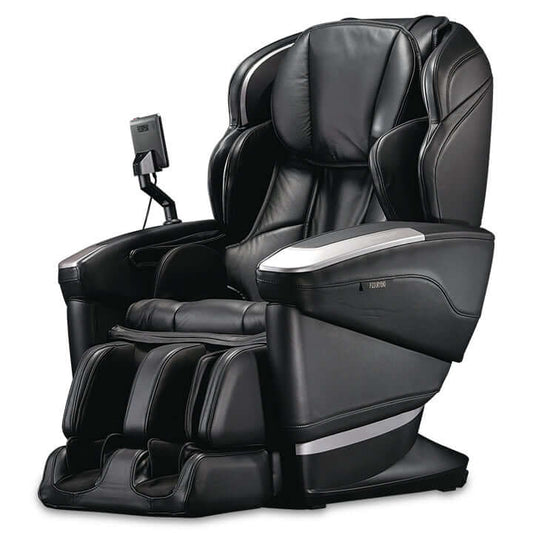
Fujiiryoki Ghế massage nổi tiếng với việc kết hợp công thái học tiên tiến với nhiều kỹ thuật massage đa dạng, cho phép người dùng nhắm mục tiêu vào các vùng cơ thể cụ thể và mang lại kết quả trị liệu. Hướng dẫn kiểu trình bày toàn diện này mở rộng các giao thức từng bước ánh xạ các kỹ thuật xoa bóp cổ điển như Thụy Điển, Shiatsu, Mô sâu, Điểm kích hoạt, Bấm huyệt, Bấm huyệt và Nhào đến các bộ phận và lợi ích chính xác của cơ thể như kiểm soát lưu lượng máu, giảm mệt mỏi, cải thiện tính linh hoạt, phục hồi chấn thương, trị liệu cơ, giảm đau, căn chỉnh cột sống, giảm căng thẳng và trị liệu mô. Sử dụng các phác đồ có thể tái tạo này để có được kết quả điều trị nhất quán từ Fujiiryoki chủ trì cho dù bạn chạy các chương trình cài sẵn hay xây dựng các phiên tùy chỉnh vào năm 2025.
Hướng dẫn này được tổ chức như thế nào
- Tổng quan về Fujiiryoki công nghệ cho phép lập bản đồ kỹ thuật
- An toàn chung, chống chỉ định và cách chuẩn bị
- Giao thức từng bước cho từng bộ phận cơ thể được nhắm mục tiêu
- Kế hoạch tập luyện toàn thân tích hợp cho các mục tiêu khác nhau
- Lập bản đồ kỹ thuật-lợi ích và ghi chú thông tin bằng chứng
- Mẹo tùy chỉnh, khắc phục sự cố và bảo trì
- Câu hỏi thường gặp mở rộng và theo dõi tiến trình
tại sao Fujiiryoki Ghế Fit Protocol-Driven Massage
- Các rãnh lăn tiên tiến và độ sâu con lăn có thể điều chỉnh cho phép cả hoạt động trượt rộng kiểu Thụy Điển và mô sâu tập trung dọc theo cột sống và các cơ cạnh cột sống.
- Cơ chế con lăn 3D và 4D có tốc độ thay đổi mô phỏng các chuyển động của tay con người như nhào, gõ và lăn với cường độ và thời gian có thể điều chỉnh.
- Túi khí đa vùng cung cấp liệu pháp nén cho chân tay, vai, hông và xương chậu, hữu ích cho việc hồi lưu tĩnh mạch, lưu thông bạch huyết và vận động khớp.
- Con lăn chân tích hợp và bản đồ bấm huyệt có thể kích thích các vùng phản xạ ở lòng bàn chân gắn liền với sự thư giãn toàn thân và cải thiện tuần hoàn ở chi dưới.
- Nhiệt độ có thể lập trình ở vùng thắt lưng và chỗ ngồi giúp tăng độ đàn hồi của mô và nâng cao hiệu quả của công việc sâu.
An toàn chung, chống chỉ định và chuẩn bị cho người dùng
- Bắt đầu mỗi buổi tập ở cường độ thấp trong 60 đến 90 giây để cơ thể thích nghi.
- Tránh các môi trường nguy hiểm với nhiễm trùng đang hoạt động, vết thương hở, gãy xương gần đây, huyết khối tĩnh mạch sâu, loãng xương nghiêm trọng, tăng huyết áp không kiểm soát hoặc trong khi mang thai trừ khi được chuyên gia chăm sóc sức khỏe cho phép.
- Nếu bạn có các thiết bị cấy ghép như máy điều hòa nhịp tim, hãy tham khảo ý kiến bác sĩ lâm sàng trước khi sử dụng bất kỳ thiết bị trị liệu bằng điện hoặc cơ học nào.
- Nếu cơn đau tăng lên trong hoặc sau một buổi tập, hãy dừng lại và tham khảo ý kiến của chuyên gia y tế. Ghế chỉ mang tính chất bổ trợ, không thể thay thế cho việc chăm sóc lâm sàng.
- Hydrat hóa sau các buổi tập và cho các mô thời gian để phục hồi sau khi làm việc chuyên sâu.
Đọc các giao thức
Mỗi giao thức bộ phận cơ thể tuân theo một định dạng trình bày nhất quán:
- Cài đặt được đề xuất: mô tả cường độ (thấp, trung bình, cao), nhiệt độ và áp suất túi khí
- Trình tự từng bước với thời lượng được đề xuất
- Các kỹ thuật cơ bản được mô phỏng bởi chiếc ghế và cách chúng liên kết với các hành động của nhà trị liệu
- Lợi ích điều trị mong muốn
- Biện pháp phòng ngừa và sửa đổi
- Mẫu có sẵn kịch bản để lập trình vào ghế
Quy trình khởi động toàn thân
Mục đích: Tăng nhiệt độ mô, tăng tưới máu, giảm độ nhạy cảm ban đầu với áp lực sâu hơn.
- Cài đặt: Cường độ lăn thấp, đèn túi khí, nhiệt độ thấp, thời gian 4 đến 6 phút.
- Trình tự: Con lăn chậm kiểu Thụy Điển di chuyển từ cổ qua vùng ngực đến vùng thắt lưng, kết hợp với các túi khí vai và hông xen kẽ để khuyến khích tuần hoàn.
- Lập bản đồ kỹ thuật: Các đường lướt dài mô phỏng các nét Thụy Điển và chuẩn bị cho lớp nền để thực hiện công việc sâu hơn.
- Lợi ích: Kiểm soát lưu lượng máu, giảm mệt mỏi, làm ấm mô để cho phép hoạt động của mô sâu an toàn hơn.
Giao thức đầu và da đầu
Mục tiêu: Da đầu, thái dương, các kiểu căng thẳng liên quan đến đau đầu và căng thẳng liên quan đến màn hình.
- Cài đặt: Cường độ lăn rất thấp ở gần khu vực cổ tử cung, tắt túi khí trên tựa đầu, không tạo áp lực mạnh trực tiếp lên mặt.
- Từng bước một:
- Khởi động cổ kiểu Thụy Điển lướt nhẹ trong 60 giây để giảm khả năng bảo vệ hình thang.
- Nén nút nhẹ nhàng giống như Shiatsu ở gốc chẩm trong 45 đến 60 giây mỗi bên.
- Kiểu nhào nhẹ và gõ nhịp nhàng trong 60 giây để thúc đẩy tuần hoàn và thư giãn da đầu.
- Kết thúc bằng việc thả lỏng từ từ và giảm sức ép nhẹ nếu ghế hỗ trợ nâng cổ trong 20 đến 30 giây.
- Kỹ thuật: Chuẩn bị kiểu Thụy Điển, nén Shiatsu, nhào và gõ nhẹ.
- Lợi ích: Giảm căng thẳng, giảm căng thẳng nhức đầu, cải thiện tuần hoàn não và thư giãn.
- Biện pháp phòng ngừa: Tránh áp lực mạnh lên xương mặt; nếu dễ bị đau nửa đầu, hãy sử dụng cường độ thấp và thời gian ngắn hơn.
Giao thức cổ
Mục tiêu: Cột sống cổ, cơ nâng vai, cơ ức đòn chũm, cơ thang trên.
- Cài đặt: Cường độ con lăn thấp đến trung bình để theo dõi cổ tử cung, túi khí vừa quanh vai, tắt nhiệt vùng thắt lưng để chỉ tập trung vào cổ.
- Từng bước một:
- Bắt đầu 60 giây kiểu Thụy Điển lướt dọc theo phần ngực trên để thả lỏng cơ.
- Kích hoạt các nút Shiatsu ở đáy hộp sọ và dọc theo mức C2-C7 trong 60 giây mỗi bên để giải quyết các điểm kích hoạt.
- Các đợt nhào lộn có mục tiêu ngắn đến xương bả vai trong 30 giây mỗi bên.
- Kết thúc bằng lực kéo hoặc giải nén nhẹ nhàng trong 20 đến 30 giây nếu ghế hỗ trợ tính năng này.
- Lợi ích: Giảm đau, giảm căng cơ, cải thiện khả năng vận động của cổ và hỗ trợ căn chỉnh cột sống liên quan đến tư thế.
- Biện pháp phòng ngừa: Giảm cường độ với các triệu chứng bệnh rễ thần kinh cổ; tham khảo ý kiến bác sĩ lâm sàng nếu có khiếm khuyết về thần kinh.
Giao thức vai
Mục tiêu: Hình thang trên, hình thoi, cơ delta, vùng giới thiệu vòng quay.
- Cài đặt: Túi khí vừa đến chắc chắn quanh vai, con lăn vừa cho vùng ngực, sưởi ấm ở mức thấp đến trung bình.
- Từng bước một:
- Hình thang ấm áp với động tác lướt kiểu Thụy Điển trong 60 đến 90 giây.
- Luân phiên nhào sâu trên hình thang trên và hình thoi từ 60 đến 90 giây mỗi bên để giảm độ bám dính.
- Ấn Shiatsu vào bờ vai và vai sau trong 45 đến 60 giây mỗi điểm.
- Kết thúc với các chu kỳ nén vai nhẹ nhàng và các xung túi khí chuyển động trong phạm vi 30 giây.
- Kỹ thuật: Nhào, mô phỏng mô sâu, Shiatsu, tập trung điểm kích hoạt.
- Lợi ích: Trị liệu cơ, giảm đau, cải thiện tính linh hoạt và ROM vai, giảm mệt mỏi.
- Biện pháp phòng ngừa: Tránh nén mạnh do rách chóp xoay gần đây hoặc viêm cấp tính.
Phác đồ lưng trên và lồng ngực
Mục tiêu: Cơ cạnh cột sống ngực, cơ thoi, căng thẳng tư thế giữa xương bả vai.
- Cài đặt: Cường độ con lăn từ trung bình đến cao cho phần giữa lưng, con lăn chậm để có độ chính xác, bật nhiệt trên ngực nếu có.
- Từng bước một:
- Làm ấm bằng cách lướt kiểu Thụy Điển từ 90 đến 120 giây theo độ cong của ngực.
- Lăn mô sâu với tốc độ chậm hơn và biên độ cao hơn trong 2 đến 3 phút, tập trung vào lực căng không đối xứng.
- Điểm Shiatsu hoạt động trên các vị trí kích hoạt ở vùng xương bả vai trong 45 đến 90 giây mỗi vị trí.
- Kết thúc bằng lực kéo điều chỉnh tư thế hoặc giải nén dựa trên độ nghiêng trong 30 đến 60 giây.
- Lợi ích: Chỉnh sửa tư thế, trị liệu mô, cải thiện khả năng vận động của xương bả vai và giảm mệt mỏi giữa lưng.
- Biện pháp phòng ngừa: Nếu bạn có thiết bị cố định cột sống hoặc phẫu thuật lồng ngực gần đây, hãy tham khảo ý kiến bác sĩ lâm sàng trước khi cài đặt sâu.
Giao thức lưng dưới và thắt lưng (Tập trung căn chỉnh cột sống)
Mục tiêu: Vùng thắt lưng, vùng cùng chậu, cân thắt lưng.
- Cài đặt: Cường độ lăn từ trung bình đến cao với các đợt sâu ngắt quãng, bật nhiệt vùng thắt lưng, túi khí vùng chậu ở mức trung bình.
- Từng bước một:
- Bắt đầu với động tác lướt nhẹ kiểu Thụy Điển trong 2 đến 3 phút để tăng cường tưới máu vùng thắt lưng.
- Lăn mô sâu với cường độ được kiểm soát trong 2 đến 4 phút, tập trung vào sự đối xứng của cột sống cương cứng.
- Sử dụng các nút Shiatsu được nhắm mục tiêu trên vùng sacroiliac và các điểm kích hoạt thắt lưng trong 60 giây mỗi điểm.
- Tùy chọn lực kéo được kiểm soát hoặc giữ không trọng lực trong 60 giây để dỡ bỏ cột sống.
- Kết thúc bằng các chu trình xả khí nhẹ và nén túi khí vùng chậu để bình thường hóa mạch máu.
- Lợi ích: Giảm đau, trị liệu cơ, cải thiện khả năng vận động của thắt lưng, hỗ trợ liên kết và giảm khả năng bảo vệ cơ bắp.
- Thận trọng: Tránh cường độ cao với thoát vị đĩa đệm cấp tính hoặc đau rễ thần kinh chưa được đánh giá. Tìm kiếm hướng dẫn của bác sĩ lâm sàng về tình trạng cột sống mãn tính.
Giao thức Glute, Hip và Piriformis
Mục tiêu: Gluteus maximus và medius, piriformis, vùng chuyển tiếp và đai hông.
- Cài đặt: Túi khí cho ghế và hông chắc chắn, con lăn ở mức trung bình, sưởi ấm vùng thắt lưng và ghế ở mức thấp đến trung bình.
- Từng bước một:
- Phức hợp cơ mông ấm áp với động tác lướt kiểu Thụy Điển trong 60 đến 90 giây.
- Nhào sâu khắp cơ mông và cơ hình lê trong 60 đến 90 giây mỗi bên để giảm tác động vào gân kheo hoặc lưng dưới.
- Túi khí nén theo chu kỳ khắp hông và đùi trên trong 60 giây để tăng cường lưu lượng bạch huyết.
- Kết thúc với lực kéo nhẹ và thả lỏng cơ mông thông qua chuyển động của ghế trong 30 giây.
- Lợi ích: Hỗ trợ phục hồi chấn thương cho các xu hướng mắc hội chứng piriformis, cải thiện tính linh hoạt, giảm triệu chứng giống như đau thần kinh tọa khi có nguồn gốc cơ bắp.
- Biện pháp phòng ngừa: Tránh áp lực trực tiếp cao lên các lồi củ xương; giảm cường độ với viêm bao hoạt dịch cấp tính.
Cơ tứ đầu, gân kheo và giao thức đùi
Mục tiêu: Cơ đùi trước và sau, vùng giới thiệu dải IT.
- Cài đặt: Túi khí đùi vừa, con lăn tập trung thấp hơn nếu có, tránh tạo áp lực trực tiếp lên khớp gối.
- Từng bước một:
- Thụy Điển lướt xuống đùi trước và gân kheo sau trong 60 đến 90 giây mỗi bên.
- Tập trung nhào sâu vào nguồn gốc cơ tứ đầu và phần đính kèm gân kheo trong 45 đến 60 giây mỗi điểm để phá vỡ sự kết dính.
- Nén khí nhẹ qua đùi bên để giải mẫn cảm dải IT trong 30 đến 60 giây.
- Kết thúc bằng các động tác vuốt theo hướng để khuyến khích tĩnh mạch quay trở lại trong 30 giây.
- Lợi ích: Cải thiện tính linh hoạt, trị liệu cơ bắp, chuẩn bị cho hoạt động và phục hồi sau khi tập luyện.
- Biện pháp phòng ngừa: Tránh làm việc sâu quá mức ngay sau khi bị căng cơ cấp tính.
Giao thức đầu gối
Mục tiêu: Mô mềm quanh xương bánh chè, gân cơ tứ đầu, võng mạc xương bánh chè.
- Cài đặt: Tránh lăn trực tiếp qua xương bánh chè; sử dụng các túi khí xung quanh và con lăn cường độ thấp hơn hoạt động gần các phần đính kèm của xương đùi.
- Từng bước một:
- Nhẹ nhàng lướt kiểu Thụy Điển trên đùi trước và xung quanh ngoại vi đầu gối trong 60 giây.
- Bấm huyệt nhẹ dọc theo đường giữa và bên đầu gối trong 30 đến 45 giây mỗi vị trí.
- Nén và nhả túi khí để cải thiện tuần hoàn quanh khớp trong 60 giây.
- Kết thúc bằng các xung vận động nhẹ nhàng mà không ép buộc phạm vi chuyển động của khớp.
- Lợi ích: Giảm đau cho các nguồn mô mềm, cải thiện quá trình hydrat hóa mô và hỗ trợ phục hồi nhẹ nhàng.
- Thận trọng: Tránh dùng nếu chấn thương dây chằng cấp tính, gãy xương bánh chè hoặc tràn dịch khớp nghiêm trọng trừ khi được bác sĩ lâm sàng cho phép.
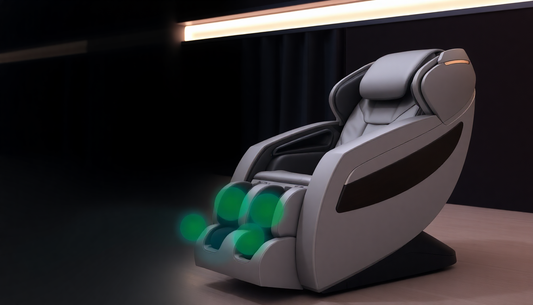
Giao thức bắp chân, mắt cá chân và gót chân
Mục tiêu: Cơ bụng, cơ dép, vùng gân Achilles, khả năng vận động của khớp mắt cá chân và cân gan chân thông qua kích thích gót chân.
- Cài đặt: Túi khí bắp chân vừa đến chắc chắn, túi khí mắt cá chân nhẹ nhàng, con lăn bàn chân vừa phải, nhấn mạnh vào gót chân và vòm, tắt nhiệt để tránh tình trạng quá tải mạch máu.
- Từng bước một:
- Bắt đầu với chu kỳ nén bắp chân trong 90 giây, tập trung vào các sóng tăng dần để khuyến khích tĩnh mạch quay trở lại.
- Kích hoạt các con lăn ở bàn chân và tập trung vào các điểm phản xạ gót chân và vòm trong 60 đến 120 giây.
- Luân phiên nén và thả lỏng mắt cá chân nhẹ nhàng trong 45 đến 60 giây để khôi phục khả năng vận động và giảm độ cứng.
- Kết thúc bằng động tác nhào nhẹ bắp chân và vuốt hướng về phía hố khoeo trong 30 giây.
- Kỹ thuật: Bấm huyệt, Nhào, Bấm huyệt, Nén liệu pháp.
- Lợi ích: Kiểm soát lưu lượng máu, giảm sưng tấy, giảm mệt mỏi và trị liệu mô cho các xu hướng viêm cân gan chân khi được sử dụng như một phần của kế hoạch điều trị rộng hơn.
- Thận trọng: Tránh áp lực mạnh trực tiếp lên gân Achilles bị viêm hoặc có nguy cơ huyết khối tĩnh mạch sâu.
Quy trình bấm huyệt bàn chân và bấm huyệt
Mục tiêu: Các vùng phản xạ thực vật tương quan với các vùng cơ quan toàn thân và tuần hoàn chi dưới cục bộ.
- Cài đặt: Con lăn chân vừa phải với sự thay đổi nhịp nhàng, túi khí xung quanh ngón chân và bàn chân trước nhẹ nhàng.
- Từng bước một:
- Bắt đầu với động tác ấn nhẹ vào lưng bàn chân trong 30 đến 60 giây để làm ấm các mô.
- Trình tự bấm huyệt bằng con lăn bàn chân từ 3 đến 5 phút ánh xạ gót chân đến vùng thắt lưng/xương chậu, vòng cung đến vùng tiêu hóa và ngón chân đến vùng đầu/cổ.
- Kết thúc với túi khí kéo giãn ngón chân và nhào nhẹ bàn chân trước trong 30 giây.
- Lợi ích: Thư giãn toàn thân, cải thiện lưu lượng máu cục bộ, giảm mệt mỏi và tăng cường phục hồi sau thời gian dài.
- Biện pháp phòng ngừa: Tránh lăn bàn chân dữ dội khi bùng phát bệnh gút, bùng phát viêm cân gan chân cấp tính hoặc phẫu thuật bàn chân gần đây.
Giao thức tập trung vào mắt cá chân và cổ tay
Mục tiêu: Vận động khớp nhỏ, mô mềm quanh gân và tuần hoàn.
- Cài đặt mắt cá chân: Túi khí quanh mắt cá chân nhẹ đến trung bình, tránh lực xoắn. Các bước bao gồm chu trình nén, kích thích con lăn tập trung vào gót chân và các xung vận động nhẹ nhàng trong 60 đến 90 giây. Lợi ích bao gồm cải thiện khả năng vận động của khớp và giảm độ cứng.
- Cài đặt cổ tay và bàn tay: Túi khí vừa cho cánh tay và bàn tay, con lăn tay hoặc mô phỏng bấm huyệt bằng tay cho lòng bàn tay và nếp nhăn cổ tay. Các bước bao gồm các kiểu bấm huyệt lòng bàn tay, vận động ngón tay và bấm huyệt cổ tay trong 90 giây. Các lợi ích bao gồm giảm mệt mỏi, cải thiện sự khéo léo và liệu pháp mô cho các xu hướng căng thẳng lặp đi lặp lại.
- Thận trọng: Tránh dùng với những trường hợp gãy xương gần đây, hội chứng ống cổ tay nặng mà không có giải pháp lâm sàng hoặc bệnh viêm khớp cấp tính.
Giao thức tay
Mục tiêu: Mô lòng bàn tay, cơ gấp ngón tay, vùng ống cổ tay.
- Cài đặt: Túi khí vừa ở cẳng tay và bàn tay, tránh lực nén mạnh vào cổ tay mặt khi biết có triệu chứng ống cổ tay.
- Từng bước một:
- Cẳng tay và cổ tay Trượt kiểu Thụy Điển được mô phỏng bằng túi khí ở cẳng tay trong 60 giây để cải thiện khả năng hồi lưu tĩnh mạch.
- Nén giống như bấm huyệt lòng bàn tay với động tác thả ra nhịp nhàng trong 60 đến 90 giây mỗi tay.
- Kết thúc bằng cách kéo ngón tay và dang tay nhẹ nhàng qua túi khí ngón tay nếu có trong 30 giây mỗi tay.
- Lợi ích: Giảm mệt mỏi, cải thiện sự khéo léo, liệu pháp mô để giảm căng thẳng lặp đi lặp lại.
- Thận trọng: Tránh nén mạnh lên vùng viêm gân cấp tính hoặc các bệnh lý thần kinh chưa được đánh giá.
Các buổi tập tích hợp toàn cơ thể: Các mẫu cho các mục tiêu khác nhau
Dưới đây là ba mẫu phiên hoàn chỉnh kéo dài 20 đến 40 phút cho các mục tiêu chung của người dùng. Mỗi mẫu liệt kê thứ tự, phân bổ thời gian và đặt điểm nhấn để bạn có thể lập trình chúng vào Fujiiryoki cái ghế.
1. Buổi thư giãn và giảm căng thẳng (30 phút)
- Khởi động: Lượn kiểu Thụy Điển toàn thân, 5 phút, cường độ thấp, túi khí nhẹ nhàng.
- Làm dịu phần trên cơ thể: Shiatsu cổ và vai và nhào, 7 phút, túi khí vừa, con lăn thấp.
- Làm dịu lưng: Massage sâu vùng ngực và thắt lưng nhẹ nhàng với nhiệt, 8 phút, lăn vừa, bật nhiệt vùng thắt lưng.
- Giải nén phần thân dưới: Bấm huyệt bắp chân và bàn chân bằng túi khí, 6 phút, lăn chân vừa phải và nén bắp chân.
- Hạ nhiệt: Lướt toàn thân với cường độ thấp và nén nhẹ, 4 phút.
- Kết quả: Giảm căng thẳng, tăng cường kích hoạt hệ phó giao cảm, cải thiện việc chuẩn bị cho giấc ngủ.
2. Buổi trị liệu phục hồi và cơ bắp cho người dùng năng động (25 đến 35 phút)
- Khởi động: Lướt kiểu Thụy Điển năng động trong 4 phút, cường độ thấp đến trung bình đối với các mô cơ bản.
- Giai đoạn mô sâu: Các đợt bùng phát mô sâu và điểm kích hoạt tập trung trên cơ tứ đầu, gân kheo và lưng dưới từ 10 đến 12 phút, các đợt bùng phát cường độ cao ngắn kèm theo các khoảng dừng phục hồi.
- Nén và tuần hoàn: Chu kỳ nén bắp chân và bàn chân trong 5 phút để hỗ trợ giải phóng lactate và hồi lưu tĩnh mạch.
- Khả năng di chuyển và giải phóng: Nhào nặn hông và mông trong 4 phút với nhiệt độ thấp để mô tuân thủ.
- Hạ nhiệt: Nhẹ nhàng lướt nhẹ toàn thân theo kiểu Thụy Điển trong 3 phút để bình thường hóa quá trình tưới máu.
- Kết quả: Liệu pháp cơ bắp, hỗ trợ phục hồi chấn thương, giảm DOMS, cải thiện khả năng sẵn sàng cho hoạt động tiếp theo.
3. Buổi điều trị tuần hoàn và giảm phù nề (20 phút)
- Khởi động: Lướt nhẹ toàn thân trong 2 phút.
- Nhấn mạnh vào bắp chân và bàn chân: Nén bắp chân kéo dài và bấm huyệt bàn chân từ 8 đến 10 phút với túi khí được đặt theo nhịp tăng dần.
- Hỗ trợ chi trên: Chu kỳ nén tay và cẳng tay 3 phút.
- Lướt nhẹ toàn thân: 4 đến 5 phút để phân phối lại chất lỏng và kết thúc bằng chườm nóng nhẹ ở vùng thắt lưng để tránh quá tải giãn mạch.
- Kết quả: Cải thiện sự hồi lưu tĩnh mạch, kích thích bạch huyết, giảm sưng ngoại biên khi sử dụng thường xuyên.
Lập bản đồ và giải thích kỹ thuật-lợi ích
Hiểu cách chiếc ghế mô phỏng các kỹ thuật của con người sẽ làm rõ kết quả mong đợi.
- Các thao tác lướt dài và xoa bóp theo phong cách Thụy Điển bắt chước thao tác vuốt ve thủ công giúp tăng lưu lượng máu bề mặt, hỗ trợ bạch huyết quay trở lại và chuẩn bị các mô để hoạt động sâu hơn. Lợi ích bao gồm kiểm soát lưu lượng máu, giảm mệt mỏi và thư giãn.
- Nhào tái tạo áp lực tròn trong lòng bàn tay để làm ấm các mô và giúp tái tạo mô và cơ. Lợi ích: trị liệu cơ, trị liệu mô và cải thiện tính linh hoạt.
- Các nút kiểu bấm huyệt và bấm huyệt áp dụng áp lực điểm duy trì có thể làm giảm tình trạng tăng trương lực cục bộ và kích thích thư giãn phản xạ. Lợi ích: giảm đau, giải phóng điểm kích hoạt, giảm căng thẳng.
- Mô sâu và lăn có mục tiêu mô phỏng các thao tác thủ công chậm, áp suất cao, tiếp cận các lớp cơ sâu hơn và phá vỡ sự kết dính. Lợi ích: hỗ trợ phục hồi chấn thương, trị liệu cơ sâu và cải thiện phạm vi chuyển động khi sử dụng cẩn thận.
- Thời gian giữ cường độ ngắn theo kiểu Trigger Point bắt chước quá trình nén thiếu máu cục bộ thủ công, sau đó là tái tưới máu, điều này có thể làm giảm độ nhạy kích hoạt cục bộ. Lợi ích: giảm các tác nhân gây đau khu trú và cải thiện chức năng cơ.
- Phương pháp bấm huyệt thông qua con lăn ở chân nhắm vào các vùng thực vật được liên kết trong bản đồ phản xạ với hệ cơ quan và hệ thần kinh. Lợi ích: thư giãn toàn thân, cải thiện tuần hoàn chi dưới và giảm triệu chứng cho các tình trạng liên quan đến bàn chân.
Ghi chú dựa trên bằng chứng và thận trọng lâm sàng
- Ghế mát-xa có thể giảm đau, cứng khớp và căng thẳng một cách hiệu quả ở những người khỏe mạnh và hoạt động như một công cụ hỗ trợ phục hồi, nhưng chúng không thể thay thế cho chẩn đoán y tế hoặc liệu pháp thủ công trong các tình trạng cơ xương khớp phức tạp.
- Nếu có thể, hãy kết hợp các quy trình sử dụng ghế với bài tập hoặc vật lý trị liệu có hướng dẫn của bác sĩ lâm sàng để thay đổi lâu dài về khả năng vận động và sức mạnh.
- Áp dụng quá tải lũy tiến: tăng cường độ từ từ và theo dõi phản ứng của mô. Đối với các tình trạng mãn tính, hãy sử dụng các buổi tập cường độ thấp đến trung bình thường xuyên thay vì các buổi tập cường độ cao không thường xuyên.
Tùy chỉnh và thiết kế giao thức lũy tiến
Việc thiết kế các phác đồ tiến bộ giúp người dùng chuyển từ giảm đau cấp tính sang thích ứng mô lâu dài.
- Giai đoạn 1 Mô cấp tính hoặc nhạy cảm: Các buổi ngắn, cường độ thấp, nhấn mạnh vào sự lướt nhẹ và nhiệt của Thụy Điển, 5 đến 10 buổi trong 1 đến 2 tuần.
- Thích ứng trung gian Giai đoạn 2: Thực hiện động tác nhào, bùng nổ điểm kích hoạt nhẹ, tăng thời lượng buổi tập lên 15 đến 25 phút và thực hiện 3 đến 4 buổi hàng tuần.
- Giai đoạn 3 Tu sửa và Tăng cường: Nhắm mục tiêu vào mô sâu hơn bằng các đợt bùng phát mô sâu có kiểm soát, giải phóng điểm kích hoạt lâu hơn và các buổi phục hồi thường xuyên sau khi hoạt động, 20 đến 40 phút mỗi buổi nếu dung nạp được.
Khắc phục sự cố thường gặp
- Đau nhức quá mức sau buổi tập: Giảm cường độ và thời lượng; thêm nhiều khởi động và hạ nhiệt. Hydrat hóa và xem xét khoảng cách các phiên xa hơn.
- Cảm giác áp lực không đối xứng: Đặt lại vị trí trên ghế, đảm bảo cột sống tập trung vào đường ray, sau đó chạy lại chương trình đối xứng để cân bằng lại các mô.
- Con lăn ở chân không thoải mái: Cường độ lăn thấp hơn hoặc sử dụng một lớp tất; tránh lăn nặng với những cơn đau ở lòng bàn chân.
- Cảm giác túi khí quá mạnh: Giảm áp suất hoặc chuyển sang chế độ nén ngắt quãng thay vì giữ liên tục.
Bảo trì và chăm sóc để đạt hiệu suất tối ưu
- Giữ ghế ở môi trường khô ráo, ổn định nhiệt độ, tránh ánh nắng trực tiếp để bảo vệ ghế bọc và các thiết bị điện tử.
- Làm sạch vải bọc bằng xà phòng nhẹ và vải ẩm; tránh các dung môi khắc nghiệt làm hỏng vật liệu.
- Chạy các quy trình chẩn đoán hoặc hiệu chuẩn do nhà sản xuất chỉ định định kỳ để đảm bảo sự liên kết của con lăn và tính toàn vẹn của túi khí.
- Theo dõi Fujiiryoki khoảng thời gian bảo dưỡng được khuyến nghị để kiểm tra cơ khí, đặc biệt khi sử dụng thường xuyên hàng ngày.
Theo dõi tiến độ và đo lường kết quả
Sử dụng phương pháp theo dõi đơn giản để đo lường hiệu quả của các giao thức theo thời gian.
- Đánh giá cơ bản: Đánh giá mức độ đau, cứng khớp, chất lượng giấc ngủ và các hạn chế về chức năng từ 1 đến 10 trước khi bắt đầu giai đoạn phác đồ.
- Ghi chú buổi học: Ghi lại thời lượng, mức cường độ, vùng cơ thể mục tiêu và phản hồi ngay lập tức sau mỗi buổi tập.
- Đánh giá hàng tuần: So sánh xếp hạng trung bình và điều chỉnh kế hoạch tuần tiếp theo dựa trên tiến độ hoặc thất bại.
- Tham khảo ý kiến bác sĩ lâm sàng nếu tiến triển bị đình trệ hoặc các triệu chứng trở nên tồi tệ hơn mặc dù đã điều chỉnh thận trọng.
Câu hỏi thường gặp mở rộng
- Hỏi: Tôi nên sử dụng ghế thường xuyên như thế nào để có kết quả điều trị tốt nhất? Đáp: Để thư giãn nói chung, các buổi tập ngắn hàng ngày rất có lợi. Đối với mục tiêu phục hồi chức năng hoặc mô sâu, 3 đến 5 buổi tập mục tiêu mỗi tuần với chương trình tập tăng dần thường mang lại kết quả tốt hơn. Luôn theo dõi phản ứng của mô.
- Hỏi: Có thể Fujiiryoki ghế mô phỏng liệu pháp kích hoạt điểm có hiệu quả? Đ: Vâng, nhiều Fujiiryoki các mô hình cung cấp áp lực nút và giữ kiểu bùng nổ gần đúng với lực nén thiếu máu cục bộ điểm kích hoạt thủ công; tuy nhiên, các kỹ thuật giải phóng lâm sàng tiên tiến được thực hiện bởi các nhà trị liệu đã qua đào tạo vẫn có thể cần thiết đối với những trường hợp phức tạp.
- Hỏi: Ghế có điều chỉnh được cột sống không? Trả lời: Ghế có thể hỗ trợ các cơ về tư thế và giảm sự mất cân bằng về cơ góp phần gây ra tình trạng lệch trục, đồng thời các tính năng như sưởi ấm vùng thắt lưng và lăn có kiểm soát có thể hỗ trợ giảm áp lực cho cột sống. Các biến dạng về cấu trúc cần được đánh giá lâm sàng và chăm sóc đa phương thức.
- Hỏi: Có an toàn khi kết hợp điều trị nhiệt và mô sâu không? Đáp: Nhiệt làm tăng độ đàn hồi của mô và thường cải thiện sự thoải mái khi kết hợp với hoạt động sâu vừa phải. Thận trọng trong trường hợp rối loạn tuần hoàn và tránh nhiệt độ quá cao với áp lực sâu cường độ cao.
- Hỏi: Tôi nên bắt đầu với cài đặt trước nào? Đáp: Bắt đầu với cài đặt trước thư giãn chung hoặc cài đặt trước khởi động toàn thân, sau đó tiến tới cài đặt trước nhắm mục tiêu cho cổ, lưng, chân hoặc bàn chân tùy thuộc vào mục tiêu của bạn.
Ưu đãi bảng cheat có thể in và tập lệnh phiên
Nếu muốn, bạn có thể chuyển đổi bất kỳ giao thức nào của bộ phận cơ thể ở trên thành một danh sách bảng ghi chú hai cột có thể in được một cách chính xác. Fujiiryoki đặt đề xuất, thời gian và danh sách kiểm tra để theo dõi mỗi phiên. Định dạng tập lệnh phiên được đề xuất để lập trình trên ghế điều khiển từ xa bao gồm:
- Số bước và khu vực
- Nhãn kỹ thuật (Thụy Điển, Shiatsu, Mô sâu, Bấm huyệt, v.v.)
- Nhãn cường độ (thấp, trung bình, cao)
- Phân bổ thời gian
- Lưu ý hoặc chống chỉ định
Kịch bản mẫu: Tập trung vào cổ và vai (8 phút)
- 00:00 đến 01:00 Khởi động kiểu Thụy Điển cường độ thấp
- 01:00 đến 03:00 Nén nút Shiatsu ở chẩm và cổ trên, cường độ thấp-trung bình
- 03:00 đến 05:00 Nhào hình thang và hình thoi trên cường độ trung bình
- 05:00 đến 06:30 Điểm kích hoạt giữ ngắn dọc theo xương bả vai (30 giây mỗi bên)
- 06:30 đến 08:00 Hạ nhiệt nhẹ nhàng kiểu Thụy Điển và nhả túi khí vai
Ghi chú cuối cùng và các bước thực hành tiếp theo
Fujiiryoki ghế massage là công cụ trị liệu mạnh mẽ khi được sử dụng với các quy trình có cấu trúc và có thể lặp lại. Bắt đầu với khởi động và cường độ thấp, tiến bộ một cách thận trọng và theo dõi kết quả. Kết hợp liệu pháp ghế với bài tập do bác sĩ hướng dẫn, trị liệu bằng tay khi cần thiết và điều chỉnh lối sống như cải thiện lượng nước, giấc ngủ và công thái học để có kết quả lâu dài tốt nhất. Nếu bạn muốn, tôi có thể chuyển đổi bất kỳ quy trình tập luyện từng bộ phận cơ thể nào trong hướng dẫn này thành một bảng tóm tắt hai cột có thể in được hoặc lập kế hoạch tiến bộ trong 30 ngày cho một mục tiêu cụ thể như giảm đau, điều chỉnh tư thế hoặc phục hồi thể thao. Hãy cho tôi biết bộ phận cơ thể hoặc mục tiêu nào bạn nên bắt đầu và tôi sẽ chuẩn bị nó.
Ghi chú của tác giả
Hướng dẫn này trình bày các quy trình dựa trên ghế có thể tái tạo được thiết kế để sử dụng tại nhà vào năm 2025. Hướng dẫn này nhằm mục đích kết nối các kỹ thuật thủ công phổ biến với Fujiiryoki các đặc điểm và không thay thế đánh giá lâm sàng khi cơn đau hoặc rối loạn chức năng vẫn tồn tại.
Tags:
Trước
Trình bày lâm sàng: Giao thức ghế massage đồng bộ
Kế tiếp
Fujiiryoki Ghế mát-xa: Cẩm nang trực quan dành cho bác sĩ lâm sàng — Lập bản đồ các kỹ thuật Thụy Điển, Shiatsu & mô sâu tới mắt cá chân, cổ, lưng, bàn chân và các lợi ích trị liệu